For any home project, be certain to follow local code and permitting requirements.
© 2022 Trex Company, Inc.
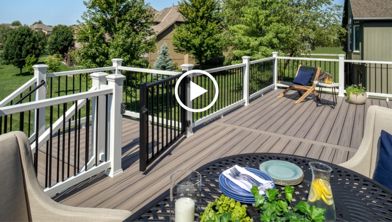
01. Intro
02. Determining the Stringer Rise and Run
03. Mark and Cut Stair Stringers
04. Stair Header Install
05. Stair Newel Post Layout
06. Install Temporary Layout / Support Block
07. Install Outside Stringers
08. Placing the Concrete Pad Form
09. Squaring and Securing the Concrete Pad Form
10. Install Bottom Newel Posts
11. Stringers to Header Connection
12. Add Trex® Protect™ to Stringers
13. Installing Treads and Risers
14. Installing Stringer Fascia
15. Recap

Step-by-Step Instructions
- 01: Number of Stair Risers and Treads →
- 02: Marking and Cutting the Deck Stair Stringers →
- 03: Installing Stair Header →
- 04: Position of the Bottom Newel Posts →
- 05: Stringer Support Block →
- 06: Place Concrete Form →
- 07: Pre-marking the Fascia for the Stairs →
- 08: Attaching Deck Stair Stringers →
- 09: Apply Trex® Protect™ →
- 10: Installing Deck Stair Treads and Risers →
- 11: Marking the Stair Fascia (Completed Stairway) →
Chapter 01: Number of Stair Risers and Treads
Print This Chapter
So you're ready to get started? Watch our how-to tutorial before you start your build.
Before you begin any DIY project, make sure to wear the appropriate personal safety equipment. Eye protection, ear protection, gloves, long pants, a long-sleeved shirt, and reinforced toe shoes are recommended. Always make sure that you have a first aid kit nearby. For any home project, be certain to follow local code and permitting requirements.
Step 1
The first step is determining the rise and run numbers of your new stairway. Rise is the height of each step, while the run is the length of each stair tread. Check with your local municipality for code requirements before getting started.
Step 2
Clamp a long 2x4 across the deck frame so it hangs out over the edge of the deck. The amount the 2x4 hangs over the end will depend on the height of the deck. For a lower deck of up to 48” it would be 4’, while for a higher deck of up to 8’ it would be 12’. This will be used as a measuring reference to help determine the height of the deck at the end of the stairway.

Use a couple of pieces of scrap decking to lay on top of the deck frame, then clamp the 2x4 in place. This is the finished height of the deck.
Step 3
The tallest run that is allowed by the IRC (International Residential Code) is 7 ¾”. Start by making a series of marks on a stick every 7 ¾”. This will be used as a story pole, which can be used to determine how many rises the stairway will have. Hold the story pole up to the deck ensuring that the pole is touching the ground and count the number of spaces that are on the pole (in this case four). This indicates how many times there will need to be a step going up to the deck.

Step 4
Knowing the number of rises that are needed for the stairway will help determine the number of treads. In this example, there are four rises, and there will be one less tread than rise (since one of the treads on the stairway will be the actual deck). This brings the total tread count to three.
The decking is 5 ½” so two pieces together will be 11”. To determine how far away from the deck the stairway will end, the depth of the treads will need to be determined.
In this example, there will be two pieces of 5 ½” decking on each tread, and the two pieces of decking will be spaced ¼” apart, which gives each tread a total depth of 11 ¼”. Three treads at 11 ¼” gives a total of 33 ¾”; this is the distance the stairway will end away from the deck.
Measure away from the deck frame 33 ¾” and mark that distance on the 2x4 clamped to the top of the frame.
The decking on the treads need to be spaced ¼” apart in order to allow for expansion and contraction as well as to allow debris to easily pass through.

Step 5
A hard, stable surface is required at the end of the stairway; this surface needs to be the complete width of the stairway and run 36” from the end of the stairway. There are many different materials that can be used for this surface (concrete, brick, pavers, etc), but it is important to check with the local municipality for a list of approved materials.
In this case, a concrete pad will be poured. A 2x4 form was made to pour the concrete into, and the form will also be used as the top of the concrete pad for measuring purposes.
Step 6
Now that the end of the stairway has been established, the height from the top of the decking to the top of the hard surface can be measured. Keep in mind, the stairway will land on the hard surface, which may be slightly higher than the ground.
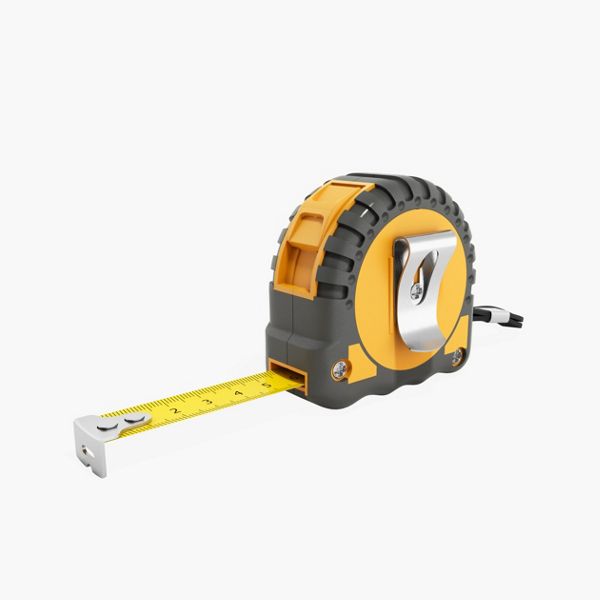
Measure from the bottom of the 2x4 clamped to the deck frame to the top of the hard surface. Use the story pole from Step 3 and hold it where the stairway will end. Then, be sure the story pole is straight up and down and place it on top of the hard surface. Mark the story pole at the bottom of the 2x4 clamped to the deck frame. Measure the end of the pole to the mark that was just made. This is the total height of the stairway.
Divide the total number by the number of risers that the stairway will have from Step 3. In this case, there are four risers, and the total number was 30”. 30” divided by four gives a rise height of 7 ½” for this stairwell. 7 ½” is less than the maximum 7 ¾” which keeps this stairway within code.

Pro Tip
Always measure at the end of the stairway instead of up against the deck as the ground may slope away from the deck and give a different measurement the further the stairs go away from the deck.
Step 7
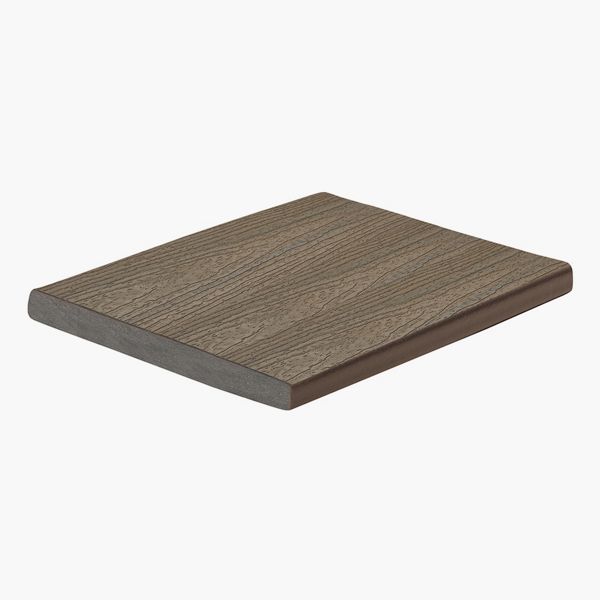
The run is the measurement of the tread and can be established at this time. In this case, the two deck boards will be put together with a ¼” gap between them. There will be a ¾” overhang of the decking, called a nosing, and the fascia material used as a riser is ½” thick.
11 ¼” – ¾” = 10 ½”. 10 ½” – ½” = 10”. The length of the run of the stair stringer (i.e., the vertical support board or structural member that runs along each side or center of the stair) will be 10”.

Pro Tip
The stair stringer dimensions will dictate whether the treads get put on the stringers first or the risers get put on first. This action will be done later but the planning is needed now.
If the dimensions of the treads are designed by taking away all the measurements of the nosing and riser thickness, then the treads will go on first. In this case the two deck boards are 5 ½” + 5 ½” + ¼” for spacing = 11 ¼”. 11 ¼” – ¾” nosing = 10 ½”. 10 ½” – ½” for the riser fascia = 10”.
In the other case where the risers are to be installed first, the measurement of the riser would not be removed from the equation. The riser material would be placed on the front and the back of the tread so it would not be deducted. Two deck boards 5 ½” + 5 ½” + ¼” for spacing = 11 ¼”. 11 ¼” – ¾” nosing = 10 ½”. 10 ½” would be the length of the run on the stringer.
Step 8
With the measurements determined for the rise and run of the stairway, the stringers can be drawn out.
What is a deck stair stringer?
A deck stair stringer is the structural component of the deck stairway that supports the decking and fascia. The stringer will be cut out of a 2”x12” piece of pressure-treated lumber with the appropriate rise and run determined by the finished height of the deck. The stairway will have multiple stringers that attach to the side of the deck and sit on top of a landing or hard surface at grade. Stringer spacing is determined by the manufacturer’s guidelines.
Step 1
Make a template of the rise and run using a scrap piece of material. A framing square can be purchased to do this, but the option detailed in these instructions will create the same template as the framing square without buying any new tools.

Square the end of a 2x12 pressure-treated piece of lumber. Hold a speed square against the 2x12 and run a circular saw against it. This will create a 90-degree angle on the end of the 2x12

Step 2
Mark the rise measurement on one side of the 2x12, in this case, 7 1/2”. Mark the run measurement on the end of the 2x12, in this case, 10”. Then, with a straight edge connect the lines and mark the diagonal, creating a triangle.

Step 3
Cut the diagonal line with a circular saw. This will give a template of the rise and run needed to mark the stair stringer.

Step 4
Attach the triangular template to a piece of 2x4 that is no longer than the side of the triangle and fasten the 2x4 to the long side.

Step 5
Place the template against the 2x12 with the run side closest to the end of the 2x12. This will be the bottom of the deck stringer. Hold the template against the 2x12 and use a straight edge to follow the line of the bottom tread. Mark the line on the straight edge through the backside of the 2x12. Mark the rise side of the template on the 2x12. Make sure to extend the line to the edge of the 2x12 for the next step.

Step 6
Move the template down the edge of the 2x12 so that the mark for the run on the template lines up with the mark made for the rise in the previous step. Mark the rise side and the run side of the template against the 2x12. Repeat this process for the number of treads that are needed.

Step 7
Once the top tread has been drawn on the 2x12, use the straight edge and place it against the rise side of the template. The straight edge will extend to the opposite side of the 2x12. Mark a line against the straight edge.

Step 8
Cut the stair stringers out by following the lines drawn in the previous step using a circular saw. Make sure to only cut up to where the lines intersect and do not cut past the line.

Step 9
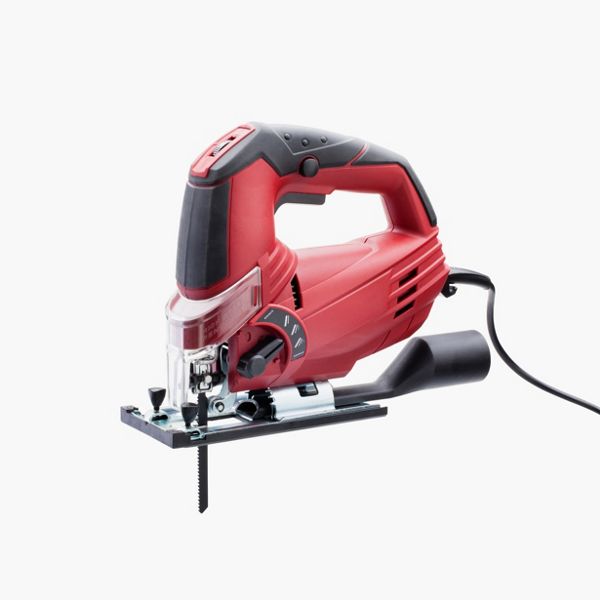
Finalize the cuts in the corners with a jigsaw. This will keep the cuts specific to the lines and not damage the rest of the 2x12.

Step 10
The bottom of the stringer will need to be cut down by the thickness of the decking used. Each stair rise must be the same height. The only exception is the bottom rise that ends the stairway. It does not have another piece of decking to equal the stair rise. In this case, the decking is 1” thick. Measure from the line drawn on the stringer up 1”. Mark that across the stringer and cut the line.

Verify the stringer is correct by putting it against the deck to measure the rise at the top and check that it sits level on the bottom surface.
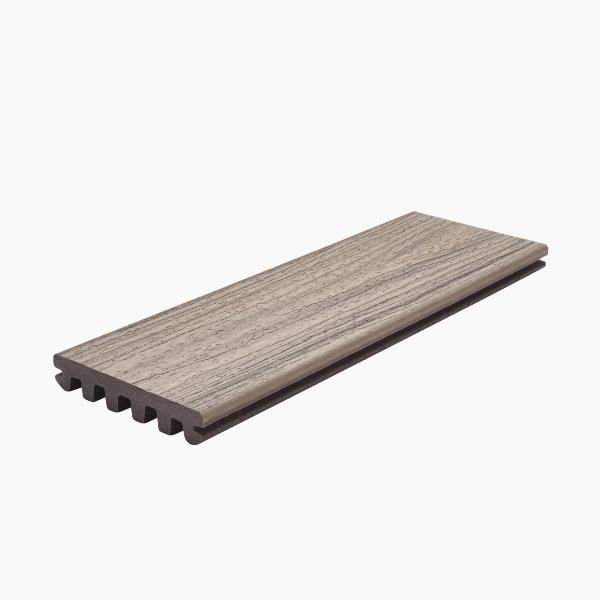
To determine the number of stringers needed, divide the width of the stairway by the length that the decking can span in stair applications (in this case, a stringer will be needed every 9”, minimum, for Trex® Enhance Decking). Then, add 1 to that number as a stringer will be needed on the end. Once the number of stringers is determined, use the first stringer as a template to mark out all the other stringers.
Cut the rest of the stringers needed for the stairway using a circular saw and jigsaw. Then, treat all cut ends of the stair stringers to prolong their life.

Step 1
Install two short pieces of 4x4 treated lumber to stick down below the frame. These need to be long enough to support the header being installed but not longer than the width of the header. The header is the beam over an opening that disperses the structural load to the outside of the opening to keep structural integrity.
To find the total length of the 4x4’s: measure the distance from the bottom of the frame to the angle of the stair stringer, then add that measurement to the width of the material used for the frame.
Place the stringer up against the deck frame to the proper height of the stair rise and measure this distance. Install the pieces of 4x4 by attaching them to the deck frame with 8” Simpson Strong Tie SDWS connector screws. Install one 4x4 piece on each side of the stairway.

Step 2
The header should be the same width as the stairway, and the height of the header should be the same as the distance from below the frame to the angle of the stringer. In addition, it should have a bevel of 32 to 38 degrees on the backside.

Attach the header to the 4x4 supports with two SDWS 5” fasteners into each support post.

Step 1
Place the outside stringers against the stair header. Start by measuring down from the top of the deck frame the height of the stair rise. In this case, it is 7 ½”.

Step 2
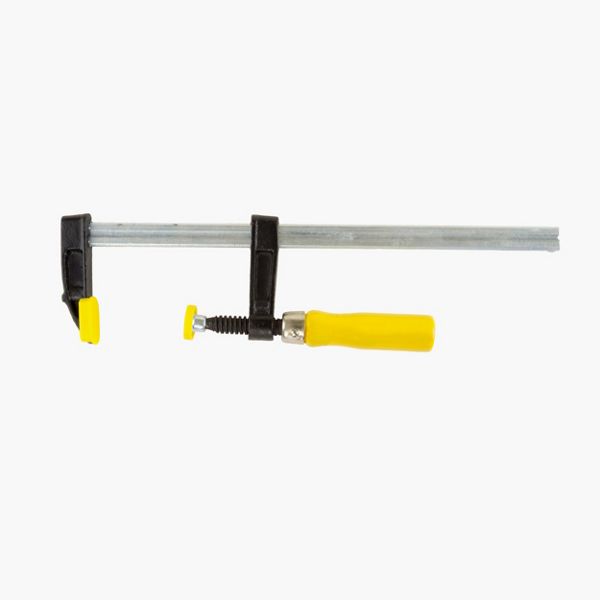
Place the two stringers against the header with the top of the stringer at the mark of the rise height. The stringers will be placed at each side of the stair header. Clamp the stringers in place.

Step 3
Clamp small pieces of 4x4 material to both ends of the stringer.
Place the 4x4 flush with the edge of the stringer and close to the ground. Do not place the 4x4 in the ground yet as the stringer will still need to be moved side to side.

Step 4
Make sure the stringers are square off the deck frame by placing a speed square against the deck frame and pressing it against the stringer. When the stringer and the deck frame are touching the speed square on all sides, the stringer is at the correct 90-degree angle.

Step 5
Mark around the 4x4s at the bottom of the stringers with marking paint. This marks the area of where the holes need to be dug for the bottom stair newel posts.

Step 6
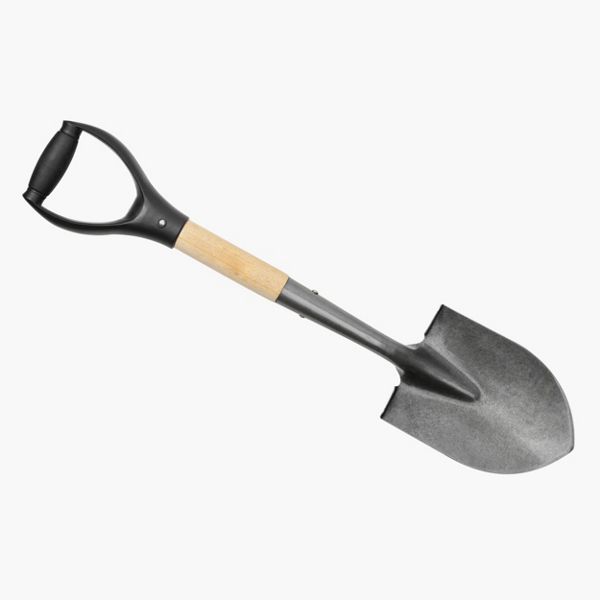
Remove the stringers and dig the holes for the newel posts. Check with your local municipality for code depth and width requirements.

Step 1
Use a 2x2 material to make the support block. Cut the support block to the same length as the stair header.

Step 2
Layout the stair stringers by marking where they will go on the support block. There will be a stringer on each end and a stringer on the inside of each newel post.
Make a line and place an ‘X’ where the stringer is to be placed.

Step 3
Divide the remaining space up by making sure there is no space greater than the approved spacing for the decking board. In this case, Trex® Enhance Decking can have a span of 9” on center from stringer to stringer, which means from the center of the one stringer to the next stringer cannot be more than 9”.

Mark the placement of the stringers and place an ‘X’ in the correct spot. Pre-drill a hole and place a screw in the material to make it quick and easy to fasten the stringers when they are put in place.
Step 4
The support block is 1 ½” thick, and the stringers will attach to the bottom of the support block, so the bottom needs to be at 7 ½” down from the top of the frame.
Place the top of the support block at that mark. Fasten the support block in place.
Pro Tip
To make it easier to see the mark and attach the support block, take 7 ½” – 1 ½” =6”. Mark 6” down from the top of the frame.

Step 5
Attach the two outside stringers by placing them tight against the bottom of the stringer block and screwing the fastener in place. Make sure the outside stringer is flush with the outside of the stair header.

Step 1
The concrete form will be the width of the completed stairway by 36” plus the length from the stair nosing to the heel of the stringer. The hard landing must be 36” past the end of the bottom stair nosing. The measurement can be longer, but not shorter.
Slide the form under the two outside stringers. The inside of the form should be lined up with the heel of the stringer. The heel of the stringer can sit on the 2x4 by about a ¼” and the rest of the stringer will be supported by the concrete. Both sides need to be placed at the same distance.


Step 3
With the stair stringer square to the deck frame, push the inside edge of the concrete form tight to the fascia material on the stringer.

Step 4
Clamp a long 2x4 to the top of the deck so that it overhangs the edge of the stairs. The length of the 2x4 will depend on the height of the deck. For a lower deck of up to 48” it would be 4’, while for a higher deck of up to 8’ it would be 12’.

Step 5
Measure from the top of the form to the bottom of the 2x4 (which represents the top of the deck). Raise the form to the correct height and place a shim under the form to hold it in place. In this case, the total height of the stairway was 30”. Which is 7 ½” x 4 risers = 30”. Repeat this process for the other side of the stairway.

Step 6
Place a stake on each side of the form to hold it in place and to the correct height. Wood or metal stakes can be used.

Pro Tip
For harder soils (rocky, clay soil, etc.), a metal stake may be easier to drive into the ground
Step 7
Fasten the stake to the form with a wood screw. The screw does not have to go all the way through the form.
Step 8
Make sure the form is square by measuring diagonally across the form. Measure one diagonal and then measure the other diagonal. The two measurements should be the same. If they are not, move the side away from the stairs one way or the other until the two diagonal measurements are the same. The end of the tape must be placed in the same orientation on each diagonal measurement.

Step 9
Level the form front-to-back and side-to-side.

Step 10
Insert a stake in the two outside corners to hold the form square and level. Fasten the stake to the form with wood screws.

Step 1
Now, we can pre-mark the fascia for the stair installation. This step can be done after the stringers are attached if you prefer.
Lay the fascia on a table or sawhorses with the finished side down. The fascia may need to be in two pieces to accommodate the width of the stringer.
Keep the two pieces of fascia tight together while the tracing is done.
Place the cut stringer on top of the fascia with the bottom of the stringer flush with the bottom of the fascia.

Step 2
Place two pieces of decking on top of the stringer treads and trace the top of the decking pieces. Keep the two pieces of fascia tight together while the tracing is done.
Decking pieces are rough and do not trace well, so it is best to use a straight edge to trace the outline.

Step 3
Next, place a piece of the riser material on the front of the stringer and trace all risers.

Step 4
Trace the bottom of the stringer where the stringer contacts the concrete.
Trace the top of the stringer where the stringer contacts the deck frame.
When the stringer is complete, the fascia can be cut out. The fascia will be attached once the stairway has been completed with treads and risers.
The second method for tracing fascia would be complete when the stair treads and risers are installed. That method will be covered later in these instructions (see Chapter 11).

Step 1
Place the stringer tight against the deck frame and support block.
Hold the stringer on its appropriate mark and fasten the stringer to the support block.
The support block is temporary and will be removed later. The stringer will sit on top of the form during installation.

Step 2
Cut the stair rim board to the appropriate dimensions. The rim board will be a piece of two-ply pressure-treated material the width of the stairway. This will be the same measurement as the stair header. The rim board will also have to be the same height as the bottom stair rise.
Measure this distance and rip the board to the same measurement.

Step 3
Tack the rim board in place with a 3” exterior wood screw. Make sure the rim board is flush with the top and sides of the stringers. Repeat the process on both sides.

Step 4
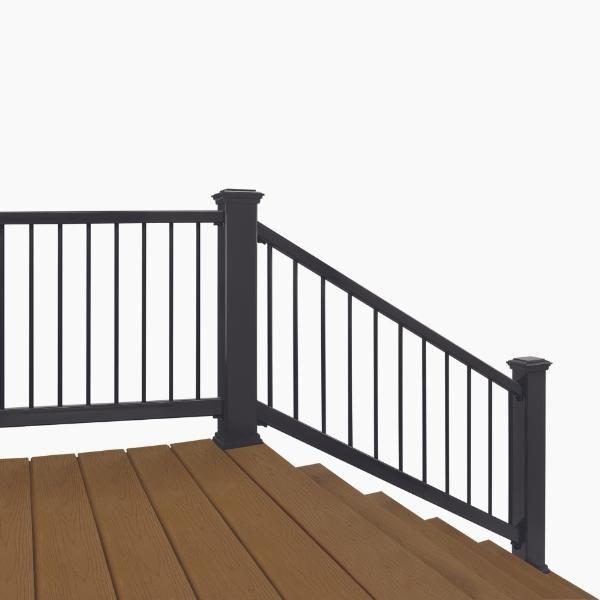
On each side of the rim board, there will be a newel post mounted between the end stringer and the next stringer. To support this newel post, 5” Simpson Strong Tie SDWS Timber screws need to be placed through the rim board and into the stringer. Two fasteners per stringer should be placed 2” down from the top and 1” up from the bottom. Pre-drill the rim board and the stringer so the fastener does not split the lumber. Insert the fasteners.
Pro Tip
To make sure the space stays even for the newel post to slide into, place a small piece of 4x4 in between the stringers to hold the spacing while the fasteners are attached.

Step 5
Slide the newel post into position between the last two stringers.
Use a post level to plumb the post and ensure that it is straight up and down. Make sure the post is tight in the corner of the stringer and rim board.
Once the post is plumb, use a 3” exterior wood screw to tack the post in place.

Step 6
Use a shim to hold the post plumb, making sure that the fastener does not pull the post out of place. The shim is also used when the post needs to be moved over to make it plumb. Composite shims are recommended as they will last longer and are more stable.

Step 7
Mark the fastener placement.
Place two 5” Simpson Strong Tie SDWS Timber screws in the front of the rim board into the post — 2” down from the top and 1” up from the bottom in the middle of the post, and two 5” Simpson Strong Tie SDWS Timber screws in the side rim joist — 1 ¾” down from the top and 1 ¼” up from the bottom; these will also be in the middle of the post. The second set of fasteners was moved slightly so they will not hit the other fasteners that are attached in the front.
From inside the stairway through the second-stringer, make a mark for one 5” Simpson Strong Tie SDWS Timber screw in the middle of the post and the middle of the stringer width. In this case, the stringer width was 6 ½”, mark 3 ¼” down from the top of the stringer.

Step 8
Pre-drill all holes to reduce the chances of splitting the lumber.

Step 9
Secure the fasteners making sure the head of the fastener is flush with the wood.

Step 10
Attach the interior stringers to the rim board.
Place the stringers into the layout on the rim board. The layout is the same as the support block layout on the top of the stairway.
Use the same measurements and place an X on the side of the mark that the stringer needs to be placed. Use a speed square to ensure the stringer is straight up and down.

Step 11
As these stringers are not attached to a newel post they do not need the 5” fasteners that were used on the end stringers. Simpson Strong Tie 3” SDWS Framing screws will be used in this situation.
Line the stringers up with the marks and make sure the stringers are flush with the top of the rim board.
Attach the fasteners through the rim board and into the stringer. The same placement is used for these fasteners: 2” down from the top of the rim board and 1” up from the bottom of the rim board.

Pro Tip
To flush the stringer with the top of the rim board, use a 3” exterior wood screw and insert it into the top of the stringer approximately 1 ½” back from the end of the stringer. Leave the fastener up off the stringer approximately ¼”. Use a hammer and place the claw between the fastener and the stringer while the head of the hammer is on top of the rim board. Pry on the handle of the hammer and raise the stringer into place so that it is flush with the top of the rim board. Fasten the stringer in place and remove the 3” exterior wood screw.

Step 12
To support the stringers vertically a mechanical attachment is necessary, meaning that some type of hanger or strapping is necessary. In this case, an MSTA15Z Simpson Strong Tie strap tie was used to attach the header to the stringers.
Place the end of the strap tie even with the top of the stair header and bend the strap tie at the bevel of the stair header. This will allow the strap tie to follow the contour of the stair stringer. Check with your local municipality for approved attachments in that area.

Step 13
Use a Simpson Strong Tie SD Connector screws to fasten one fastener into the strap tie near the bevel of the stair header.

Step 14
Tap the strap tie tight against the bottom of the stringer and fill all holes in the strap tie with Simpson Strong Tie SD Connector screws. Repeat this step on all stringers.
Use Trex® Protect™Joist and Beam Tape on all cut stringer areas. This will protect the lumber and prolong the life of the stairway.

Step 1
The stair stringer dimensions will dictate whether the treads get put on the stringers first or the risers get put on first. If the dimensions of the treads were designed by taking away all the measurements of the nosing and riser thickness, then the treads will go on first.
In this case, the two deck boards, 5 ½” + 5 ½” + ¼” for spacing = 11 ¼”. 11 ¼” – ¾” nosing = 10 ½”. 10 ½” – ½” for the riser fascia = 10” as was determined earlier. In the other case where the risers were to be installed first, the measurement of the riser would not be removed from the equation. The riser material would be placed on the front and the back of the tread so it would not be deducted. Two deck boards 5 ½” + 5 ½” + ¼” for spacing = 11 ¼”. 11 ¼” – ¾” nosing = 10 ½”. 10 ½” would be the length of the run on the stringer. Install the treads first in this instance.
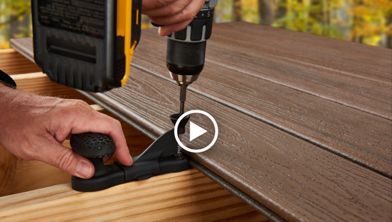
Place the first deck board on top of the stringers flush with each side stringer and tight to the spacers on the deck frame. Pre-drill the decking 1” in from the end of the board and 1” in from the edge of the board. Use a color-matched composite fastener to attach the deck board. Check the Trex Installation Guide for a list of approved fasteners.

Step 2
Use a ¼” spacer to place between the two deck boards.
Place the second deck board tight against the spacer and repeat the pre-drill and fasten.
Remember, if the front deck board will be overhanging the riser by ¾” and the riser is ½”, then the fastener needs to be an inch away from the edge of the stringer to avoid cracking.
Measure back from the edge of the deck board 2 ¼” for the fastener.

Step 3
Pre-drill the riser material at every stringer location: two fasteners in each stringer 2” from the top of the fascia and 2” from the bottom of the fascia. In this case, Trex® Fascia material was used and cut to match the width of the stairway and the height of the riser. Install the riser board with the approved fasteners.

Step 4
In this case, a fastener with a plug-on top application was used to hide the fasteners. The fascia fastening system will come with a pre-drill bit to drill the appropriate size hole for the plug. The plug will also come in the kit. The plug is made of the same material to match precisely.
Place the plug in the hole and tap flush with a hammer.

Step 1
Place the fascia material on a table or sawhorses finished side down.
Use the template used to mark the stair stringers, and place them against the top of the fascia and at one end.
Trace the rise side of the template onto the fascia. Continue that line all the way across the piece of fascia. This will be referred to as the plumb cut.

Step 2
Mark the top of the fascia at the end of the run section of the template.
Repeat this process the number of rises calculated for the stairs. In this case, it was four rises.

Step 3
Once the bottom rise has been reached, mark the run side of the template onto the fascia material.
Complete the line to the other side of the fascia.

Step 4
Cut the plumb cut and the flush cut.
Place the piece of fascia against the side of the stairway with the fascia tight against the deck frame and stair stringer.

Step 5
Trace the treads and risers of the stairway onto the piece of fascia.

Step 6
With the fascia marked, it is now ready to be cut. Use a circular saw for the long cuts and a jigsaw for the corner cuts.

Step 7
In the instance that the fascia needs to be wider, a second piece can be added to the bottom of the stairway.
Cut the piece of fascia to the desired width, mark the plumb cut and the flush cut. The piece of fascia can now be cut and installed.

For more information on fascia installation, refer to the Trex Install Guide.


Materials
3" SDWS Simpson Strong Tie Framing Screws
5" Simpson Strong Tie SDWS Timber Screws
8" Simpson Strong Tie SDWS Connector Screws
SDWS 5" Fasteners
Simpson Strong Tie SD Connector Screws


This content was partially or fully generated by AI and has been reviewed by our team to ensure accuracy and relevance.
(NOT ALL PRODUCTS ARE AVAILABLE IN EVERY COUNTRY.)

Copyright © 2026 Trex Company, Inc. All rights reserved.
Photos and videos © 2026 Warner Bros. Discovery, Inc. or its subsidiaries and affiliates. All trademarks are the property of their respective owners. All rights reserved.
- Country
-
Australia
-
Austria
-
Bahrain
-
Brazil
-
Canada English
-
-
Chile
-
Colombia
-
Costa Rica
-
Cyprus
-
Czech Republic
-
Fiji
-
France
-
Germany
-
India
-
Ireland
-
Israel
-
Kuwait
-
 Lithuania
-
Mexico
-
Netherlands
-
New Zealand
-
Norway
-
Oman
-
Qatar
-
Saudi Arabia
-
South Africa
-
Spain
-
Sweden
-
Switzerland
-
Turkey
-
United Arab Emirates
-
United Kingdom
-
United States
-
Venezuela
By choosing your country, you acknowledge that you have read Trex's Privacy Policy